Glossary for Confluence Cloud - User Guide
- Peter Eigenschink
The space glossary
To give each definition the right context, terms are attached to spaces via the space glossary. It can be found in the navigation bar of the corresponding space and contains the terms separated by their first letter.
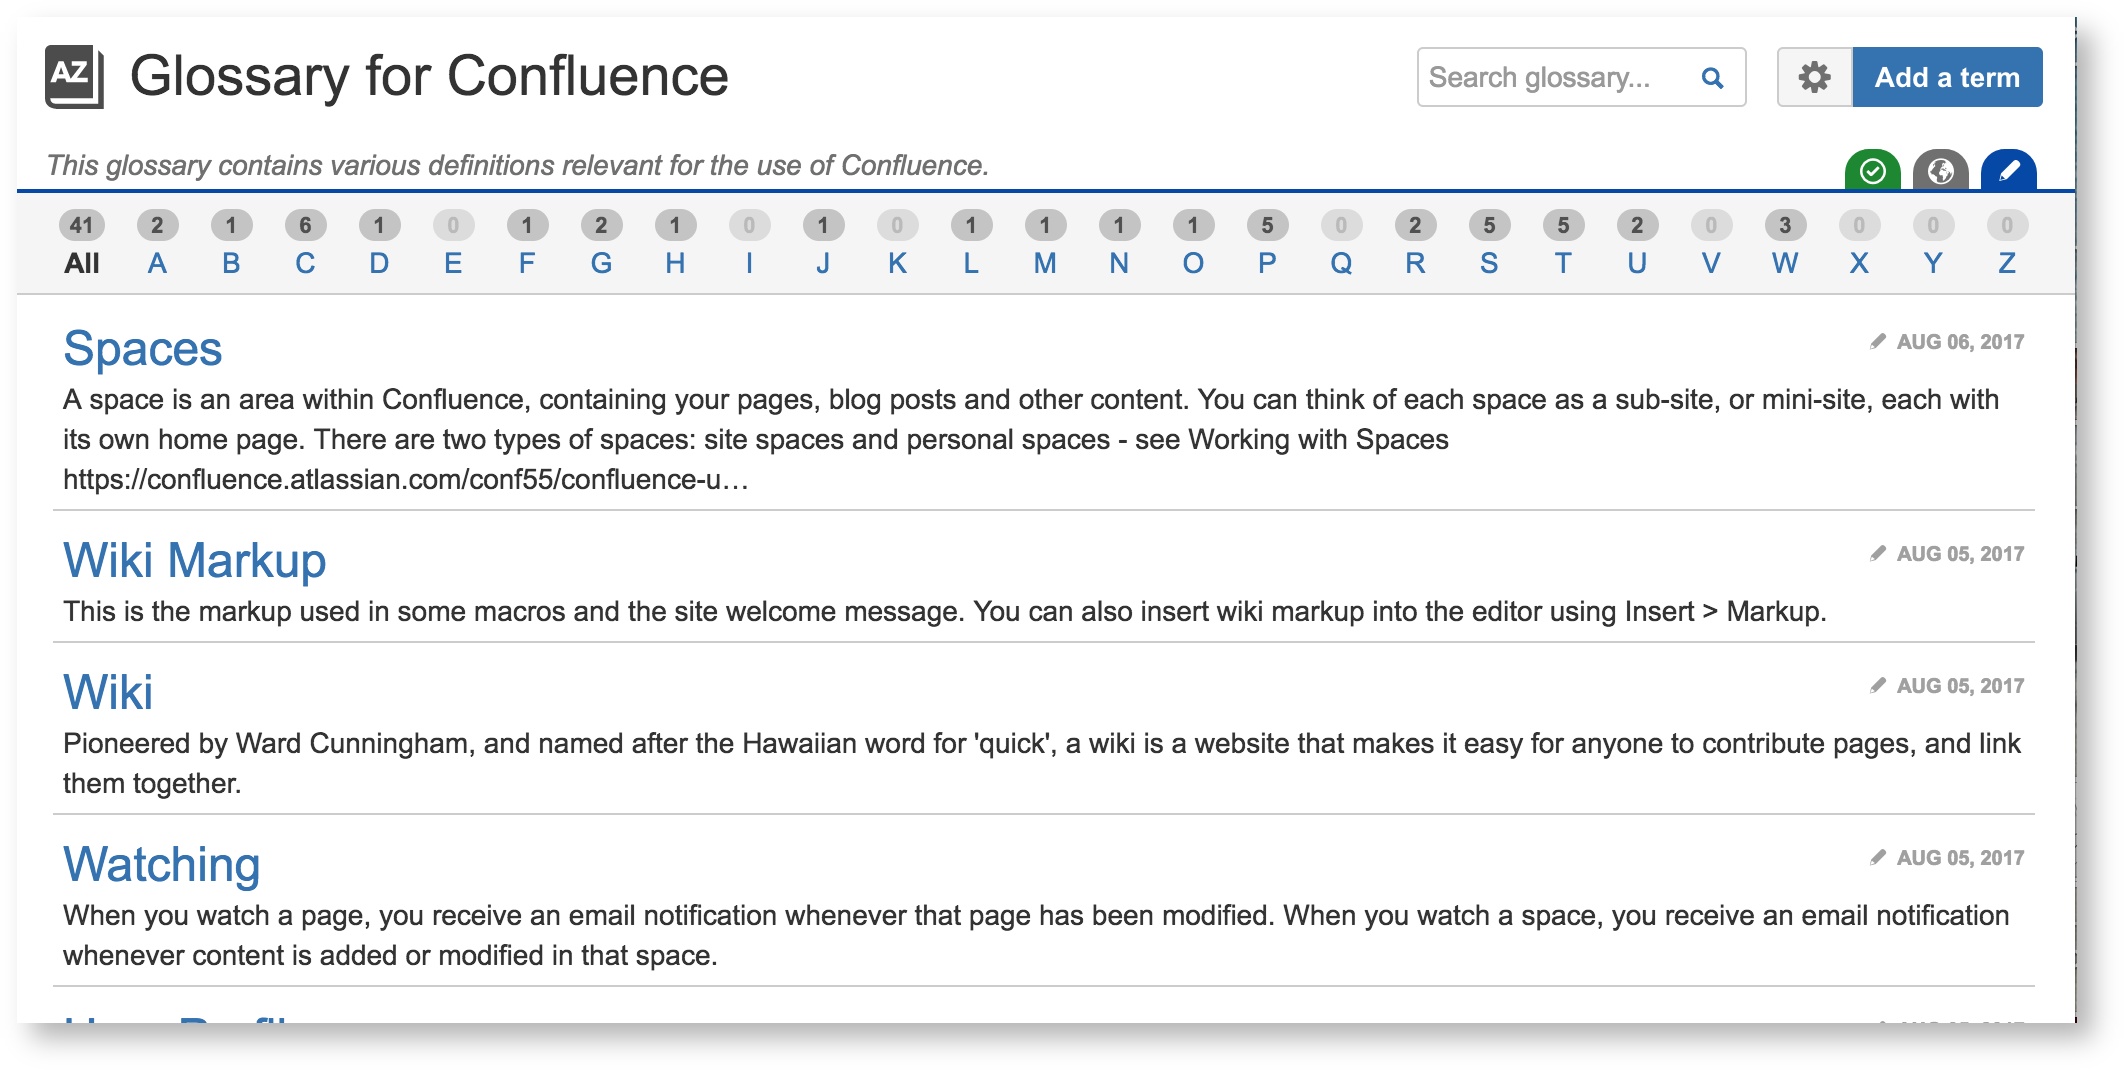
Next to the header you can find controls to search the space glossary, to edit your personal search settings and to add a new term to the glossary. Directly below the header there is additional information about that glossary, like a description and whether or not the glossary is active or global together with the possibility to change that, see screenshot.
In the navigation bar below the header you can see possible filtering options together with the corresponding count of terms. All is selected by default and shows all terms which are defined within this glossary. By selecting one of the character filters the shown terms will be restricted to ones starting with that character. Initially you will see latin characters A-Z, with some of them possibly showing 0 terms. The list will be extended if you add terms beginning with different characters.
The main part of the space glossary contains the terms which could be found in the glossary with the selected filter. You see the title of the term, synonyms, when it has been modified the last time and an excerpt of its definition. As only 10 results are shown per page, in the footer you can switch pages if there are more than 10 results. By clicking on the title of the term you are going see a details of that term, where you can also delete or edit it.

Search the space glossary
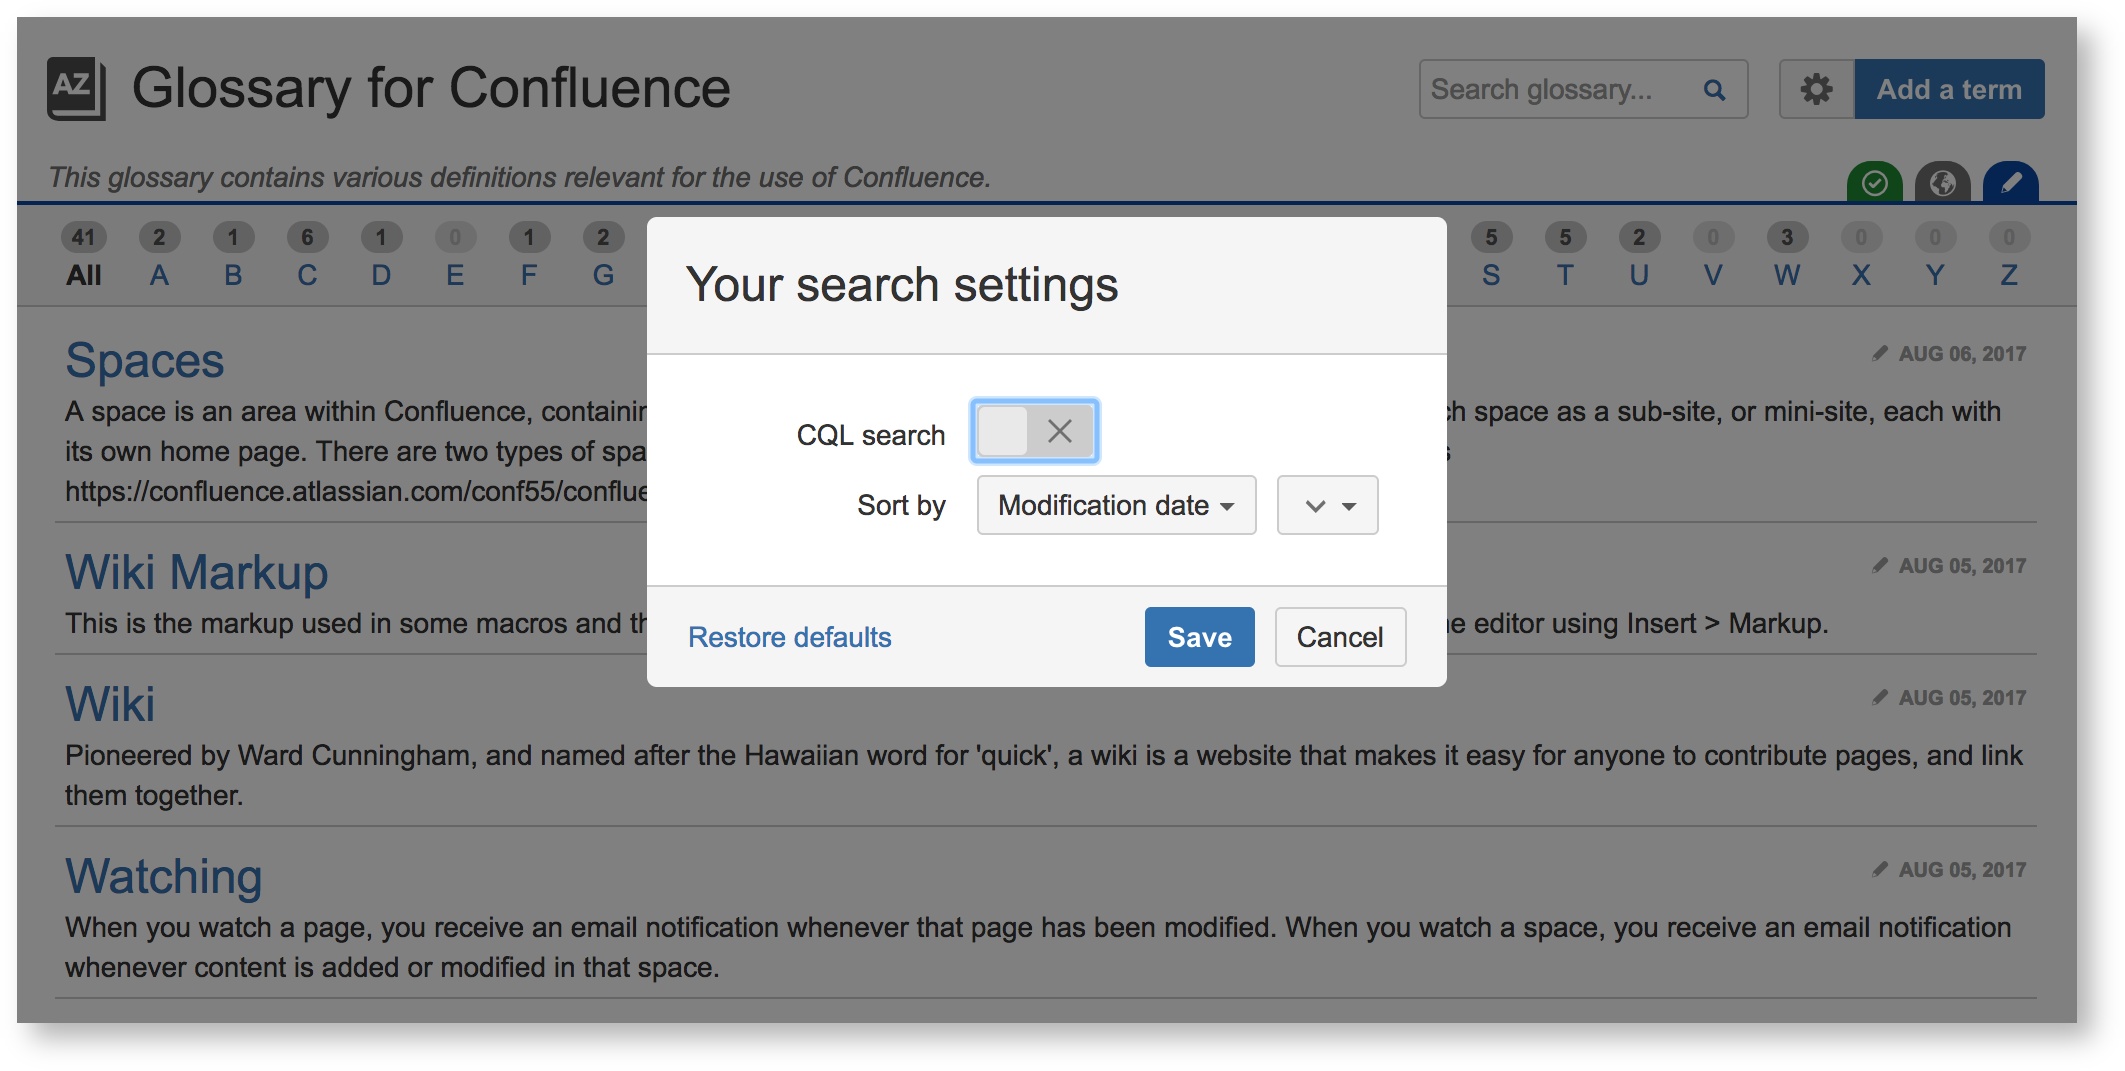
There is a standard text search box next to header of the glossary where you can look for a given text in terms or in their definitions. If those rather simple capabilities are not sufficient there is a button to edit your personal search settings next to the search box. There CQL search can be activated and also the standard order of the terms can be changed, which is descending by modification date.
If CQL search is activated you can use standard CQL syntax. For example to find all terms in the space glossary containing the text agile in the term itself or in its definition you can use the search query text~"agile". You can also use the search bar to order the terms by a property different to that configured.
The page glossary
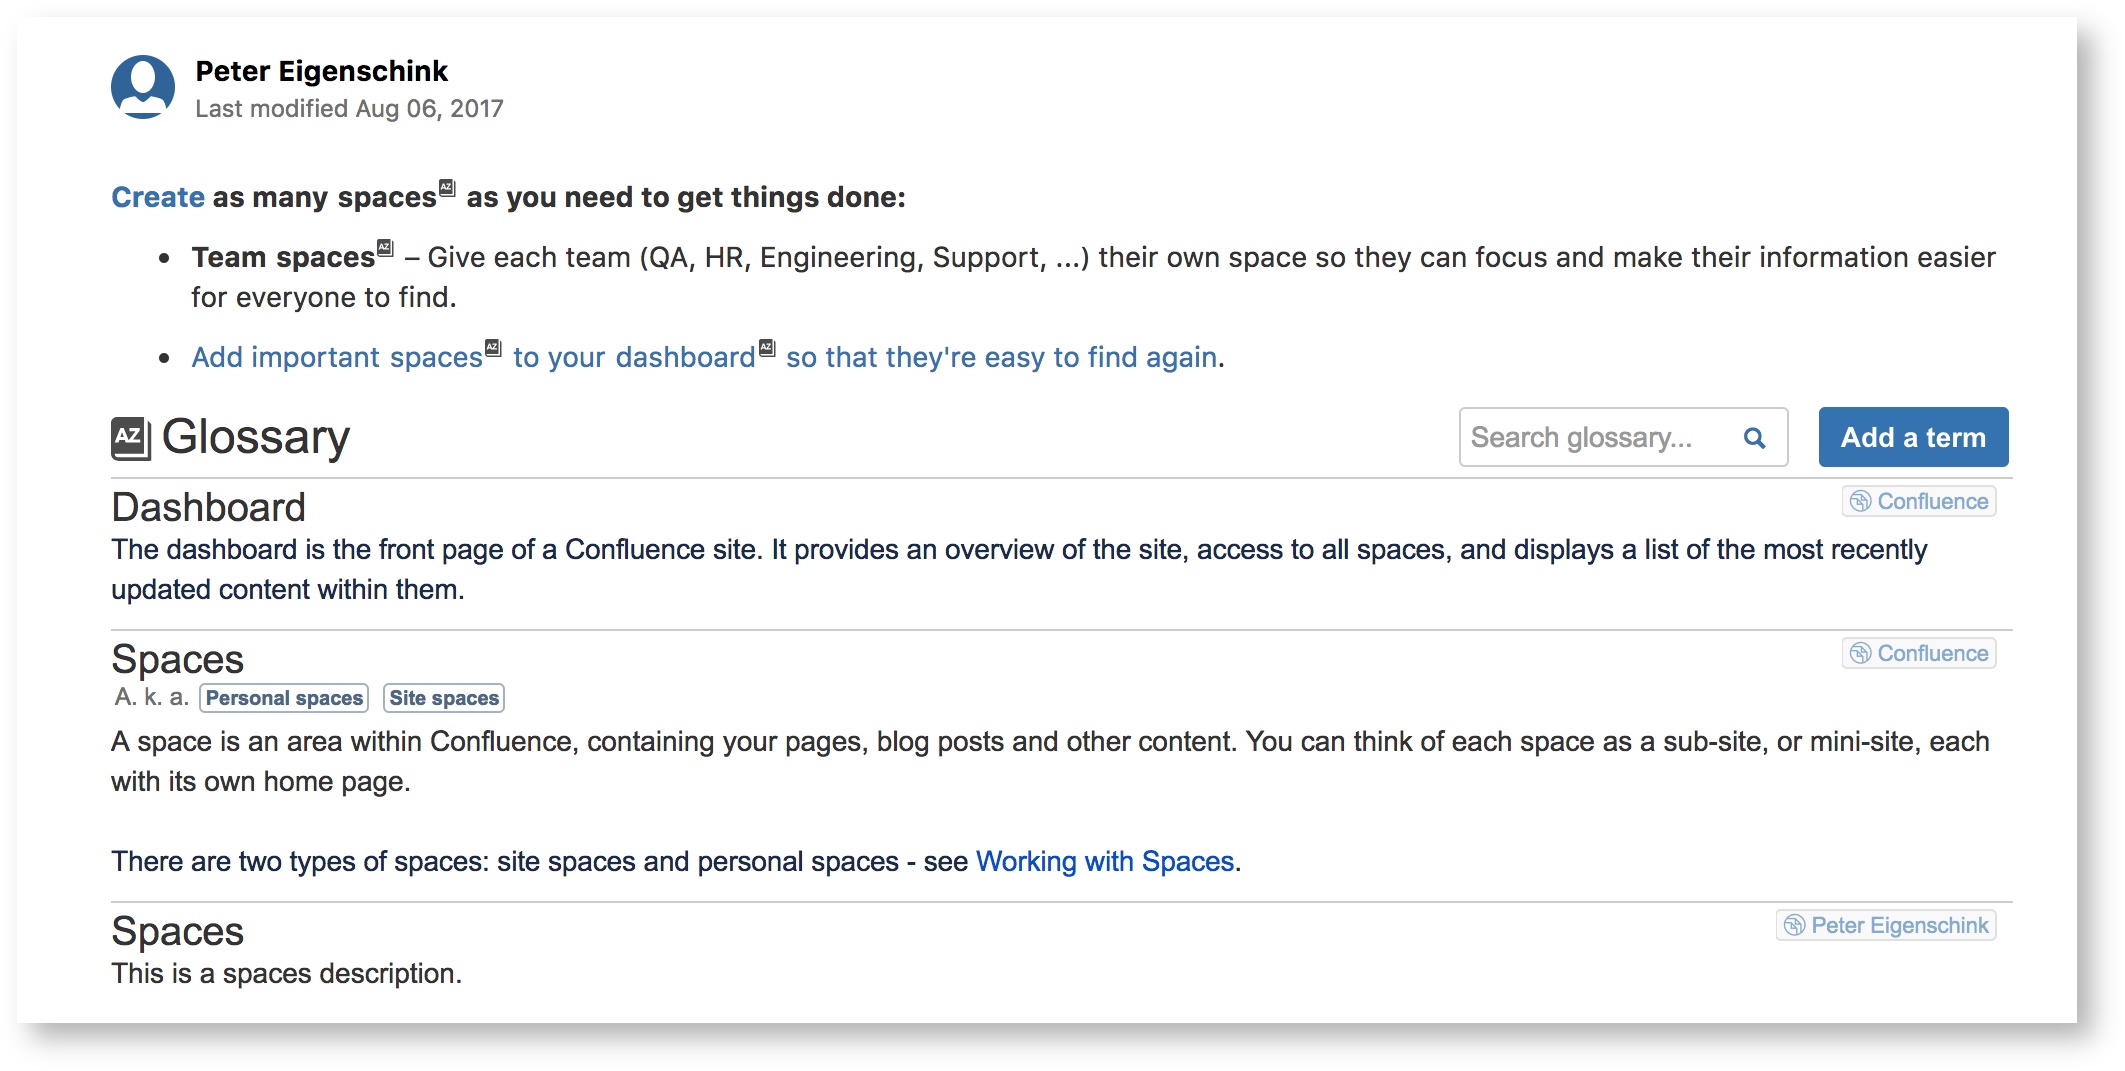
The page glossary is a glossary restricted to the context of a single page. It provides the term definitions you have already added to your space glossary. It can by used by adding the Page glossary macro to the page, then a Glossary section is added, containing all terms from the space glossary also found in the current page. The search bar next to the header of the Glossary section is a standard text search for terms or parts of terms. When you type something and hit enter you will only see terms which contain that text. It is also possible to display that section in a Footnote style, which will take much less space.
The standard case, being restricted to terms appearing in the space glossary, can also be extended in some ways:
- Global glossaries: Besides looking for terms in the space glossary, all terms appearing in global glossaries will also be displayed
- Synonyms: Besides looking for the terms themselves, also synonyms will be looked up and displayed
- Inactive glossaries: Whether global or space glossary, if the glossary is not active the terms therein will not be looked up
Note that those extensions can lead to multiple definitions for the same term. So in order to distinguish them all terms are displayed together with their source glossary and with all their synonyms.
The global glossary
Space glossaries can be marked as global. The result is that page glossaries will also look up terms in those glossaries, even if they are not in the same space. To get an overview of all global terms and their definitions there exists a Global glossary. It can be found in the general navigation bar and is very similar to space glossaries. The main differences are that you for each term you see the source space of that term and that you can not directly add terms to the glossary. In order to add terms you have to do that in one of the (global) space glossaries.

Highlighting terms
Besides the page glossary, which contains all terms appearing in the page, it is also possible to highlight the terms directly where they appear in the content of the page. In order to do that you need an extension either for Chrome or for Firefox. Then for every page there will be a term lookup similar to that done by the page glossary, finding all terms in the space glossary and in global glossaries, etc. . For each found term there will be a small icon displayed next to that term and upon clicking the term the description(s) will be displayed inside a dialog. Note that for links you only have to hover the term.

Add a term
To add a term you can either use the link in the space glossary or in the page glossary. In any case you will end up on the view shown in the screenshot below. In the large upper text box enter the term you would like to add. Add the description of the term in the text area below the term. There you can use several several text formatting tools similar to the tools you know from Confluence. Be aware that a term has be at least two characters long and that it can only appear once per space glossary. Also you have to provide a description.
If the term starts with a character which is not present in the space glossary yet, after saving the term exactly that character will appear in the space glossary.

View a term
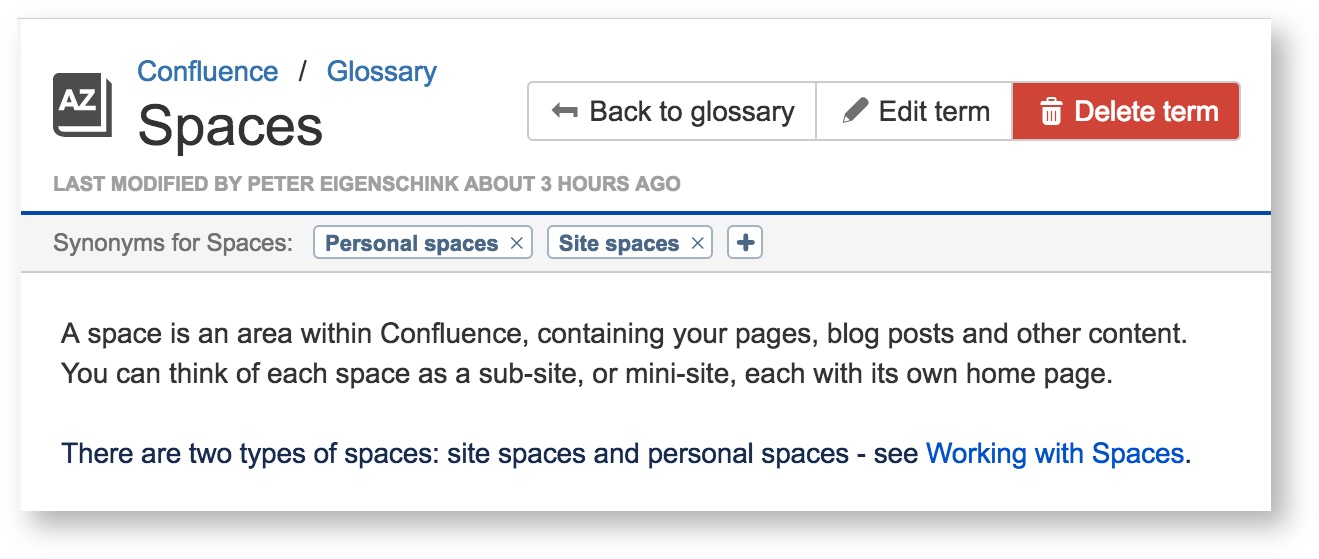
You can view a term by selecting it in the space glossary, in the global glossary or in the page glossary. You can edit or delete the term, but you can also manage synonyms for that term which are relevent for lookup in the page glossary.
Export & Import
It is possible to export terms from a space glossary into a CSV file and import a similar file containing terms, their descriptions and synonyms into the space glossary.
Those two features can be helpful in various use cases:
- Backup: You are able to perform regular backups by exporting the whole space glossary. Those can be recovered by re-importing the backup.
- Bulk-update: To update or create multiple terms at once it can be useful to first download the export, then add terms or edit the terms line by line and finally importing the file. This way it is rather quick to edit multiple terms at once.
- Port: Terms can easily be shared to external systems or transferred to other Confluence spaces.
To use those features you need the space administration permission. Then you can find them in each space via Space settings > Add-ons.
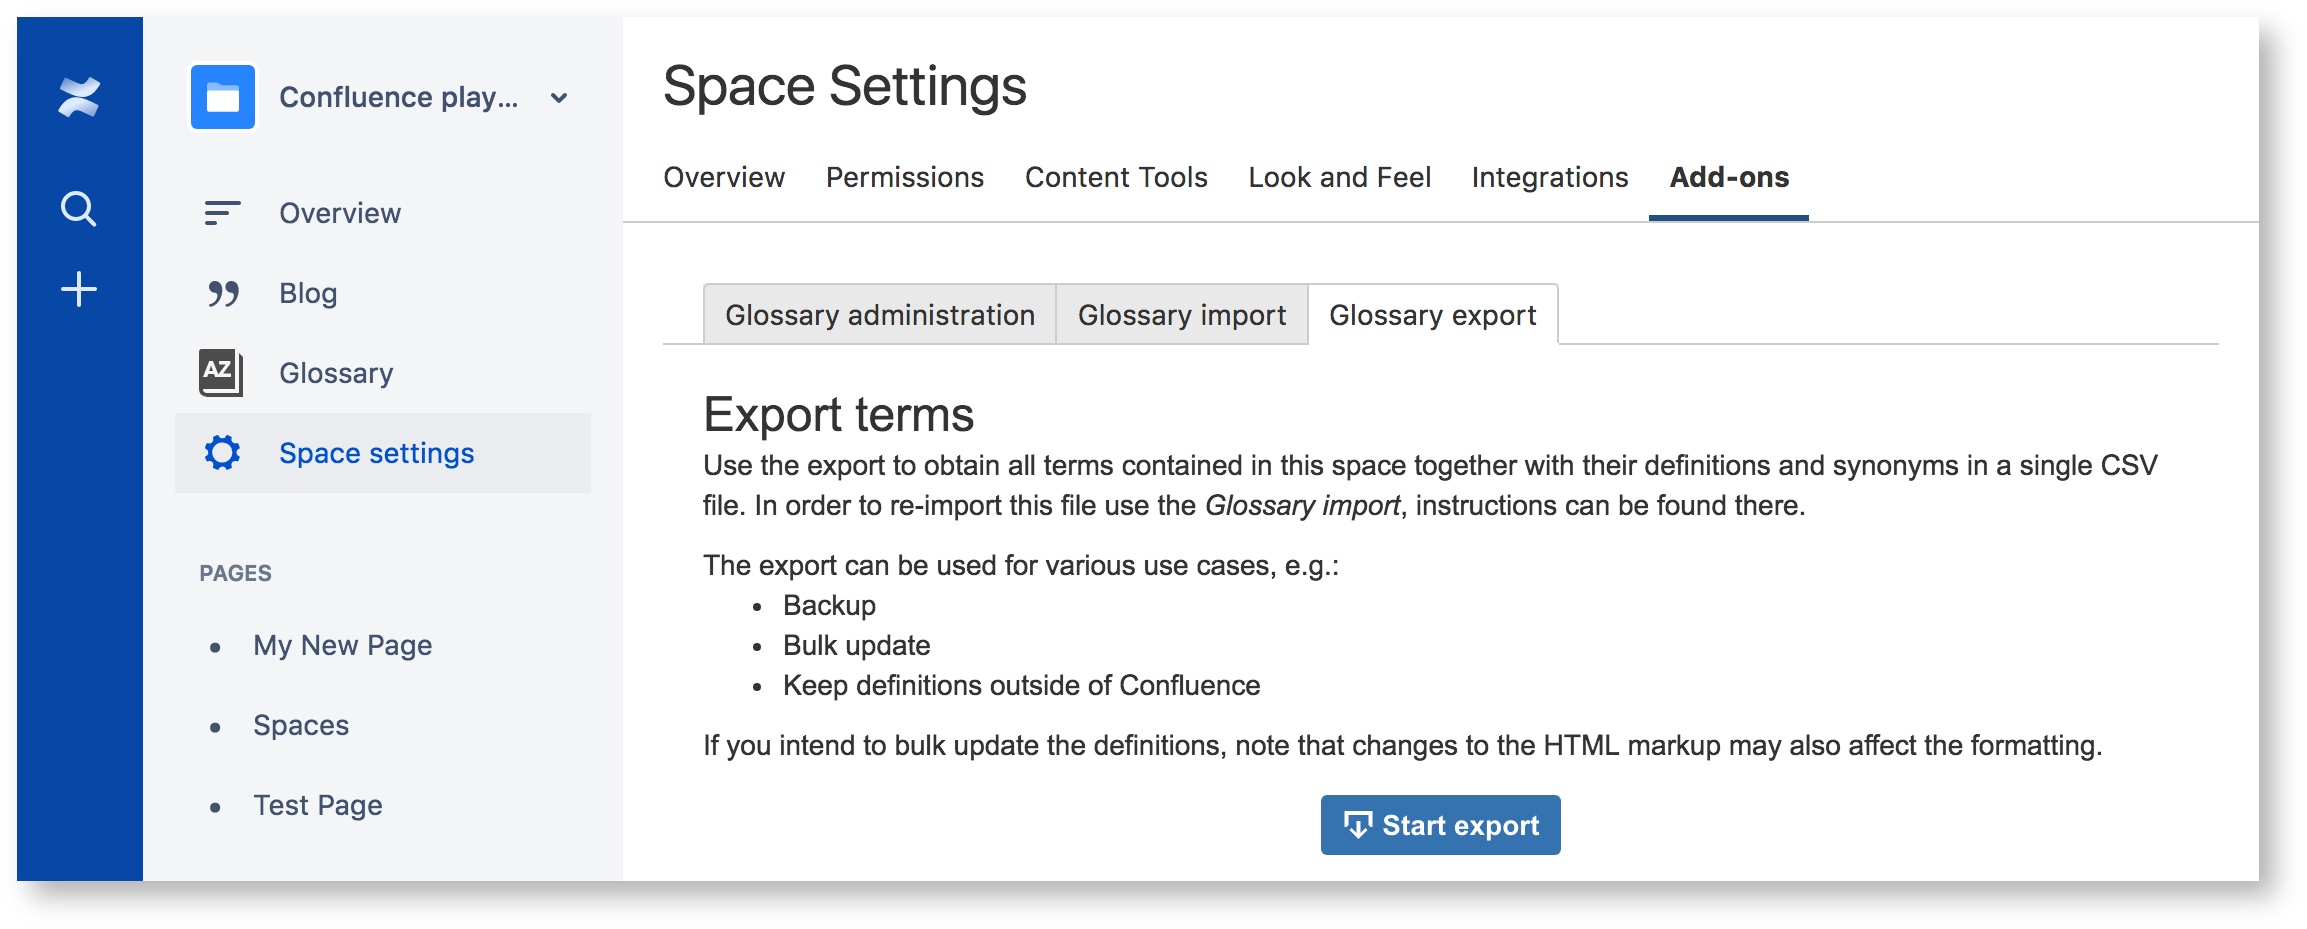
Export
The export can easily performed by just clicking the button Start export in Space settings > Add-ons > Glossary export. You will see the progress of the export, depending on the size of your space glossary this process can take a couple of minutes and you should not leave the page, otherwise you have to restart it.
After the export is finished you will see a button Download export, by clicking it you obtain a CSV file containing all terms in the space glossary. Each row in the file represents one term with the following 4 columns:
- space: The space the term is attached to
- term: The term itself
- version: The version of the term
- synonyms: Synonyms associated with the term, separated by semicolons if multiple are present
- definition: The definition of the term. If the definition is formatted in some way this column may also contain HTML markup
Import
The import of a CSV file can be performed in three steps, starting at Space settings > Add-ons > Glossary import.

Step 1: File selection
Choose a CSV file containing at least the two columns term and definition, with headers. Altogether the following columns are considered during an import:
- term: The term itself
- version: The version-number of the term, this will be considered for validation. If you performed an export to obtain the file this field will be filled with the version of the exported term.
- synonyms: Synonyms associated with the term, separated by semicolons if multiple are present
- definition: The definition of the term. If the definition is formatted in some way this column may also contain HTML markup
After you have selected the file click Read file and the validation will be started.
Step 2: Validation
During the validation the file is read line by line and the data is prepared for the import and you can see how many terms will be considered - those which do not contain a term or a definition will not be considerd.
Also if you are re-importing a exported file, or you filled the version column manually, using the version the space glossary is checked for existing terms. If those terms have been modified since you exported the file you will see a warning after the validation has finished.
The warnings just have a informational purpose and you can start the import anyway.
Step 3: Import
While the terms are imported you will see how many terms will be imported totally, and which term is imported at the moment. You should not leave the page while the import is running, otherwise just some terms are updated and others are not or the definition will be updated and the synonyms are not, which may result in a bad state. If that happens anyway it can probably be resolved by reimporting the file and synchronizing the letters counts afterwards.
After the import has finished you will see an overview of how many terms have been created and how many have been updated. If you would like to start another import just refresh the page.